
In the realm of QuickBooks, a powerful tool for managing financial records, the term “revert” holds significant importance, especially for those new to the software. To navigate the intricacies of this feature effectively, it’s essential to grasp both its definition and practical application.
What does revert in QuickBooks?
In QuickBooks, “revert” essentially signifies the capability to undo or reverse a transaction or action within the software. It serves as a mechanism to return a record or transaction to a previous state in the system.
For instance, imagine you’ve inadvertently entered an incorrect amount for a transaction or accidentally deleted one. The “revert” tool comes to your rescue, allowing you to effortlessly roll back these changes and restore the record to its prior state.
This functionality plays a pivotal role in error prevention and ensures the accuracy and timeliness of your financial data.
What can “revert” do in QuickBooks?
QuickBooks users will find the “revert” button immensely beneficial for several reasons:
- Undo changes – It empowers users to reverse alterations made to their company file swiftly. This proves particularly handy when erroneous information has been input, saving the trouble of manually rectifying each transaction individually.
- Restore from backup – In situations where the current company file becomes corrupted or harbors irreparable errors, the “revert” button comes to the rescue. It allows you to restore your company file from a previous backup, ensuring data integrity and continuity.
By availing of the “revert” feature, you can circumvent the laborious process of individually rectifying transactions or attempting to reconstruct deleted records, thereby saving valuable time and effort.
In summary, revert in QuickBooks serves as your trusty undo button, offering a reliable means to rectify errors and maintain the integrity of your financial records. Whether you need to backtrack on a transaction or restore from a backup, this tool proves invaluable in keeping your financial data accurate and up-to-date.
Unlocking the Power of “Revert in QuickBooks for Sales
In the realm of QuickBooks, the “Revert” feature stands as a versatile and powerful tool when it comes to managing sales-related tasks. Let’s embark on a journey to understand what “Revert” signifies in QuickBooks for sales and how it can be effectively employed in various scenarios.
To revert a sales transaction –
- Need to undo or reverse a previously recorded sales transaction? The “Revert” option is your solution.
- Ideal for cases where customers wish to modify or cancel orders or when an erroneous transaction entry occurs.
- Seamlessly rolls back the sale, erasing it from financial records for enhanced data accuracy.
To revert to an earlier version of a sales report –
- Harness the “Revert” feature to access previous iterations of sales reports.
- Valuable when comparing sales data from different time periods or rectifying discrepancies in current reports.
- Gain insights by delving into historical sales data stored in earlier backups of the company file.
To revert to a prior state for sales data –
- When navigating a trail of unintentional modifications to sales data, the “Revert” function is your ally.
- Efficiently restores data to a previous state, saving time and effort.
- Crucial for rectifying changes that may have affected multiple transactions or when the need arises to return data to an earlier point.
Practical steps – Reversing sales receipts in QuickBooks
- Launch QuickBooks.
- Create a sales receipt for the buyer.
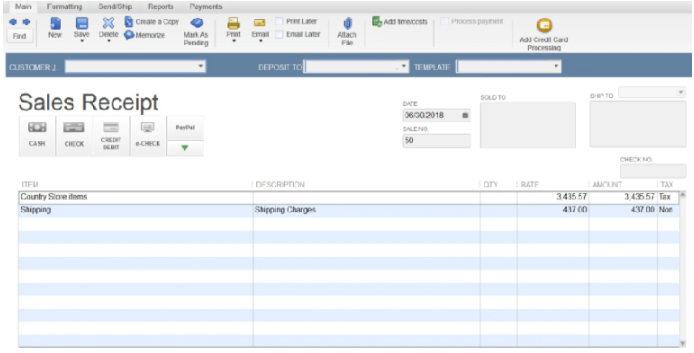
- Locate and click on the QuickBooks “Revert” button.
In essence, the “Revert” button in QuickBooks for sales serves as a reliable tool, enabling users to effortlessly undo modifications and restore data to its former state when required.
Understanding Revert in QuickBooks for Invoices
Revert an invoice to a previous version –
- The feature Revert in QuickBooks empowers users to effortlessly undo changes made to an invoice or restore it to a previous version.
- Practical for situations where an invoice was accidentally deleted, incorrect information was entered, or customer requests necessitate alterations.
- Ensures that your invoices remain accurate and error-free.
Revert to a previous backup
- Users can utilize the “Revert” feature to access earlier versions of invoices or recover deleted ones by restoring a previous backup of the company file.
- A valuable resource when the current invoice version contains errors or when comparing different iterations of the same invoice.
- Safeguards against data loss and streamlines document retrieval.
Undoing changes in an invoice in QuickBooks
Here are the general steps to undo changes made to an invoice in QuickBooks –
- Open QuickBooks and navigate to the “Customers” menu.
- Access the invoice form to view the list of invoices.
- Observe a small button adjacent to the “Save & New” button.
- In case of inadvertent changes to the invoice, click the “Revert” button to undo modifications.
- Be cautious not to click “Save” after using “Revert” to ensure seamless reversal of changes.
“Revert” for various document types
- The utility of the feature Revert in QuickBooks extends beyond invoices and includes a range of other document types.
- Users can employ “Revert” to undo changes made to purchase orders, credit memos, estimates, and reports.
- Note that alongside “Revert,” there is a “Clear” button, which removes the entire form.
Important consideration
- While the “Revert” button efficiently rolls back the most recent modifications, refrain from clicking the “Save” option after using “Revert” to ensure the ease of undoing changes that have been made.
What does Revert in QuickBooks means for other documents?
Within QuickBooks, the revert function extends its utility beyond invoices and sales transactions. Users can also employ this feature to undo alterations made to various other elements such as:
- Purchase orders
- Credit memos
- Estimates
- Reports
It’s important to note that alongside the “Revert” option, there exists a “Clear” button. When you utilize the “Clear” button, the entire form will be removed.
You can use the same techniques to reverse the estimates and enter bills –
- To reverse estimates or enter bills, simply access the respective tabs in QuickBooks.
- At the bottom of the screen, select the “Revert” button.
- Your documents will promptly return to their original state with a simple click of “Revert.” Remember that “Clear” removes the entire form.
In essence, the Revert in QuickBooks emerges as a versatile and indispensable tool, simplifying invoice management and enhancing document control. By employing “Revert,” you can ensure the accuracy of your financial records, recover lost data, and maintain a seamless workflow in your financial management endeavors.
Mastering Transaction Management in QuickBooks – Delete, Revert, and Clear
In the realm of QuickBooks, errors can creep in – a keystroke gone awry, an incorrect amount entered – leading to unintended changes in your transaction records. Thankfully, QuickBooks offers several handy options to rectify these missteps, including “Clear,” “Undo Typing,” and the trusty “Revert” button. Let’s delve into how you can seamlessly navigate these tools to maintain pristine transaction records.
Deleting transactions in QuickBooks –
- Locate the transaction you wish to delete within your QuickBooks account.
- Click on the transaction to select it.
- Navigate to the “File” button in the menu bar.
- From the ensuing dropdown menu, opt for “Clear.”
- QuickBooks will seek your confirmation before proceeding with the deletion.
- Once you confirm, the transaction will be permanently removed from your company file.
Reverting transactions in QuickBooks –
- Identify the transaction that requires reversal within your QuickBooks interface.
- Click on the transaction to select it.
- Navigate to the “File” button located at the bottom of the screen.
- From the dropdown menu, choose “Revert.”
- QuickBooks will prompt you to specify the reason for reverting the transaction.
- Upon confirmation of the reason, QuickBooks will undo all changes made to the transaction since its last save, effectively restoring it to its prior state.
Clearing transactions in QuickBooks
- Initiate the transaction management process as described in the earlier steps.
- From the dropdown menu accessed through the “File” button, select “Clear.”
- QuickBooks will mark the transaction as cleared, signifying its reconciliation with your bank statement.
Restoring QuickBooks transactions – QuickBooks provides multiple avenues to restore transactions –
- Utilize the “Clear” button to delete entries from the employee, vendor center, customer, or bank account register.
- Employ the “Undo Typing” button to remove the most recent entry from the item list.
- Harness the “Revert in QuickBooks” button to revert to a previous change, effectively restoring your transaction’s previous state.
Restoring QuickBooks to a Prior Date – A Step-by-Step Guide
In the realm of QuickBooks, reverting to a prior date essentially means restoring a backup of your company file. Whether you’re rectifying errors or need to access historical data, here’s a straightforward guide to help you navigate this process seamlessly.
- Open QuickBooks and locate the File menu in the top-left corner of the interface.
- From the File menu, choose the “Open or Restore Company” option.
- Within the subsequent menu, select the “Restore a backup copy” option and click “Next” to proceed.
- Browse your system to locate and select the backup file that corresponds to the date you wish to revert to. Ensure you’ve saved your backups in a recognizable location.
- Specify a location on your system where you’d like to save the restored company file.
- It’s prudent to assign a new name to the restored file to avoid confusion with your existing company file.
- Click on the “Next” button to initiate the restoration process. QuickBooks will proceed to restore your data from the selected backup file.
- QuickBooks will prompt you to choose where you’d like to save the restored file. Ensure you select an appropriate location for easy access.
- Once the restoration process is complete, you can open the restored company file to verify that it contains the data from the prior date you intended to revert to.
Important note – Restoring a backup in QuickBooks will replace all existing data in your software with the data from the backup file. It’s crucial to create a backup of your current company file before proceeding with the restoration process. This ensures you have a safety net in case anything unexpected occurs during the restore.
How to Utilize the Reverse Transaction Feature?
In the realm of QuickBooks, managing payments and invoices is a breeze. However, there are occasions when payment mishaps occur, leading to the need for a swift solution. Enter the Reverse Transaction feature, a powerful tool that empowers you to undo payments applied to incorrect invoices effortlessly. Let’s explore how to navigate this feature seamlessly.
Option 1 – Reverse a transaction
- The “Reverse a Transaction” feature is your go-to when you need to refund a payment. Find it under “Processing Tools.”
- Ideal for situations where you’ve made a payment to the wrong invoice and need to initiate a refund.
Option 2 – Reverse (void/credit)
- The “Reverse a Transaction” feature is your go-to when you need to refund a payment. Find it under “Processing Tools.”
- Ideal for situations where you’ve made a payment to the wrong invoice and need to initiate a refund.
Using reverse a transaction feature for refunds – Here are the steps to use the reverse a transaction feature in QuickBooks –
- Log into the “QuickBooks Payment” account.
- Select “Processing Tools” from the drop-down menu now.
- Select “Reverse a Transaction” from the menu.
- Fill out the form with the required information.
- Select “Search” from the menu.
- Select the transaction you want to cancel.
- Click the “Submit” button.
Leveraging reverse (void/credit) to undo incorrect payments – To reverse a payment, use the reverse (void/credit) feature.
- Access the “Activity & Reports” section from the drop-down menu.
- Navigate to the “Transactions” tab.
- Specify the date or period of the transaction in question.
- Select “Search” to proceed.
- Identify the transaction you intend to reverse by opting for the “Transaction ID” option.
- From the menu, select “Reverse (Void/Credit).”
- Check the checkbox next to the transaction to be reversed.
- Confirm your action by selecting “Submit.”
In conclusion, mastering the Reverse Transaction feature in QuickBooks provides you with a valuable tool to rectify payment errors swiftly and efficiently. Whether you need to initiate refunds or reverse incorrect payments, these steps ensure that your financial transactions remain accurate, and your records stay error-free.
Common Mistakes to Steer Clear of When Using Revert Mean in QuickBooks
QuickBooks is a versatile tool for managing your finances, and the Revert feature is your ally when it comes to undoing changes or rectifying errors. However, it’s essential to navigate this tool with caution to prevent data loss or unintended consequences. Here are some common mistakes to sidestep when utilizing the feature of Revert mean in QuickBooks –
- Not backing up Your data – Failing to create a backup of your company file before using Revert can lead to irreversible data loss. Always safeguard your existing data before making significant changes.
- Reverting to the wrong version – Ensure that you select the correct version or date to revert to. Mistakenly choosing the wrong version can result in unintended alterations to your financial records.
- Not checking for linked transactions – When using Revert, it’s crucial to check for linked transactions that may be affected by your changes. Neglecting this can lead to discrepancies in your financial data.
- Not understanding the impact on other transactions or reports – Reverting a transaction can have a ripple effect on other related transactions and reports. Make sure you comprehend how your actions will affect your financial records as a whole.
- Not keeping track of changes made – Maintain a record of the changes you make using the Revert feature. This ensures transparency and helps you trace your steps if any issues arise.
You May Read More: Where is the Gear Icon in QuickBooks
You May Read More: QuickBooks Online Refund Customer Overpayment Error
Frequently Asked Questions
What does revert mean in QuickBooks?
In QuickBooks, “revert” refers to the action of undoing or reversing changes made to various types of transactions and forms, such as invoices, sales transactions, purchase orders, and more.
What is the function of the “revert” feature in QuickBooks?
The “revert” feature in QuickBooks allows users to roll back recent modifications to transactions and forms, effectively restoring them to their previous state.
How does “revert” work in QuickBooks?
To use the “revert” feature, locate the transaction or form you want to undo changes for and click the “Revert” button. This action will reverse the most recent alterations made to that item.
In QuickBooks, what does “revert” do for deposit transactions?
For deposit transactions in QuickBooks, the “revert” function can be used to undo changes made to the deposit record, such as adding or removing items from the deposit.
Can you explain the purpose of the “revert” option in QuickBooks?
The purpose of the “revert” option is to provide QuickBooks users with a means to correct or reverse unintended changes in transactions, forms, or reports, helping maintain accurate financial records.
What is the significance of the “revert” button in QuickBooks?
The “revert” button is significant as it allows users to easily and quickly restore transactions and forms to their previous state without the need for manual corrections.
How does the “revert” function impact data in QuickBooks?
The “revert” function only affects the most recent changes made to a transaction or form, ensuring that data accuracy is maintained while providing a way to correct errors.
When should I use the “revert” feature in QuickBooks?
You should use the “revert” feature when you need to undo recent changes that were made in error or that you wish to revise in QuickBooks transactions, forms, or reports.
Are there any limitations to using “revert” in QuickBooks?
Yes, the “revert” feature can only undo the most recent changes. It’s important not to click the “Save” option after using “revert” to avoid complicating the process of undoing previous changes.
Can you clarify what “revert” in QuickBooks means for reports and transactions?
“Revert” in QuickBooks allows you to reverse any recent modifications made to both transaction entries and the data presented in reports, ensuring that your financial records stay accurate and reliable.